AIP
接入 Slack
将 Agent 加入 Slack,在频道或私聊中提问、处理文件,与团队一起使用。
开始前
准备一个已启用的 Agent,以及 Slack 工作区的 App 安装权限。
创建 Slack App
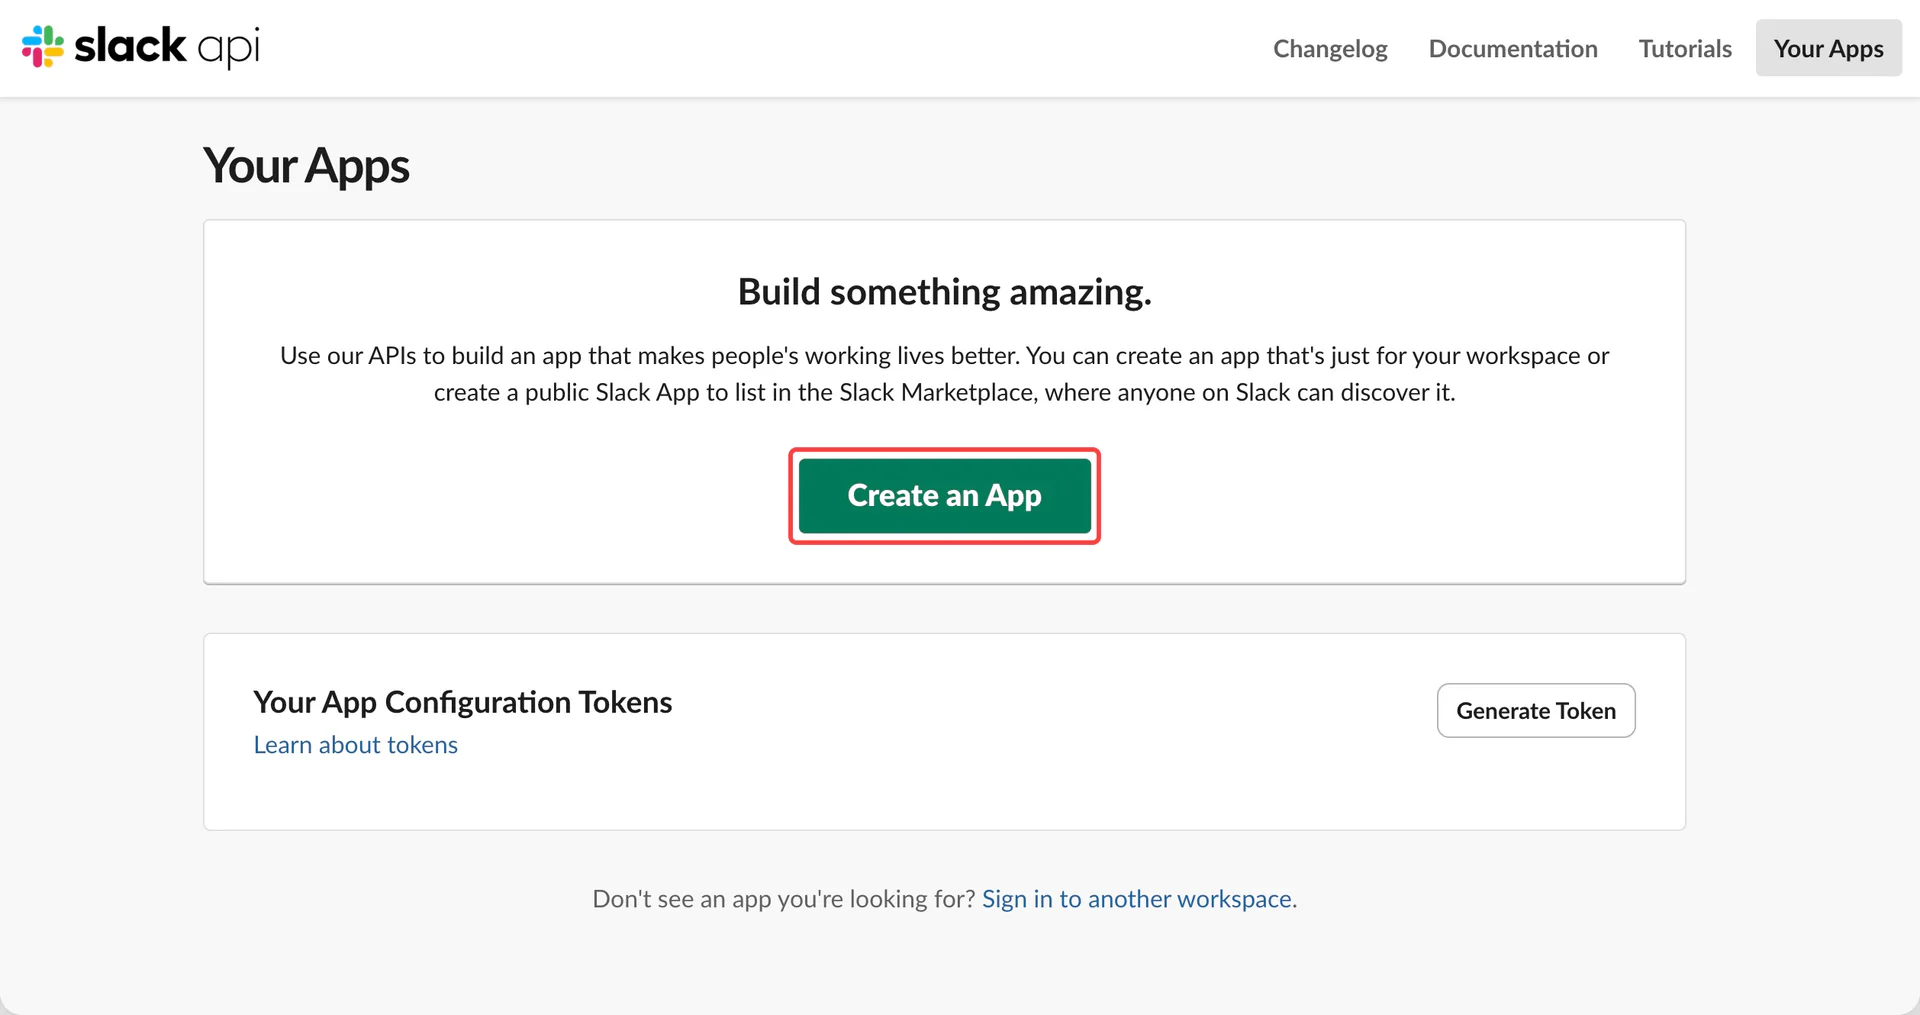
打开 Slack Apps 后台,点击 Create an App。
选择 From a manifest 和目标工作区,切换到 JSON,粘贴以下配置并完成创建。
Slack App Manifest(完整 JSON)
{
  "display_information": {
    "name": "HAST Agent",
    "description": "Agent conversations, channel history, public search and files"
  },
  "features": {
    "bot_user": {
      "display_name": "hast-agent",
      "always_online": false
    },
    "app_home": {
      "home_tab_enabled": false,
      "messages_tab_enabled": true,
      "messages_tab_read_only_enabled": false
    },
    "agent_view": {
      "agent_description": "Ask your HAST Agent for help with messages, history and files."
    }
  },
  "oauth_config": {
    "scopes": {
      "bot": [
        "app_mentions:read",
        "assistant:write",
        "channels:history",
        "channels:read",
        "chat:write",
        "emoji:read",
        "files:read",
        "files:write",
        "groups:history",
        "groups:read",
        "im:history",
        "im:read",
        "im:write",
        "mpim:history",
        "mpim:read",
        "mpim:write",
        "pins:read",
        "pins:write",
        "reactions:read",
        "reactions:write",
        "search:read.public",
        "users:read"
      ]
    }
  },
  "settings": {
    "event_subscriptions": {
      "request_url": "https://example.com/slack/events",
      "bot_events": [
        "app_mention",
        "message.channels",
        "message.groups",
        "message.im",
        "message.mpim"
      ]
    },
    "socket_mode_enabled": false,
    "org_deploy_enabled": false,
    "token_rotation_enabled": false
  }
}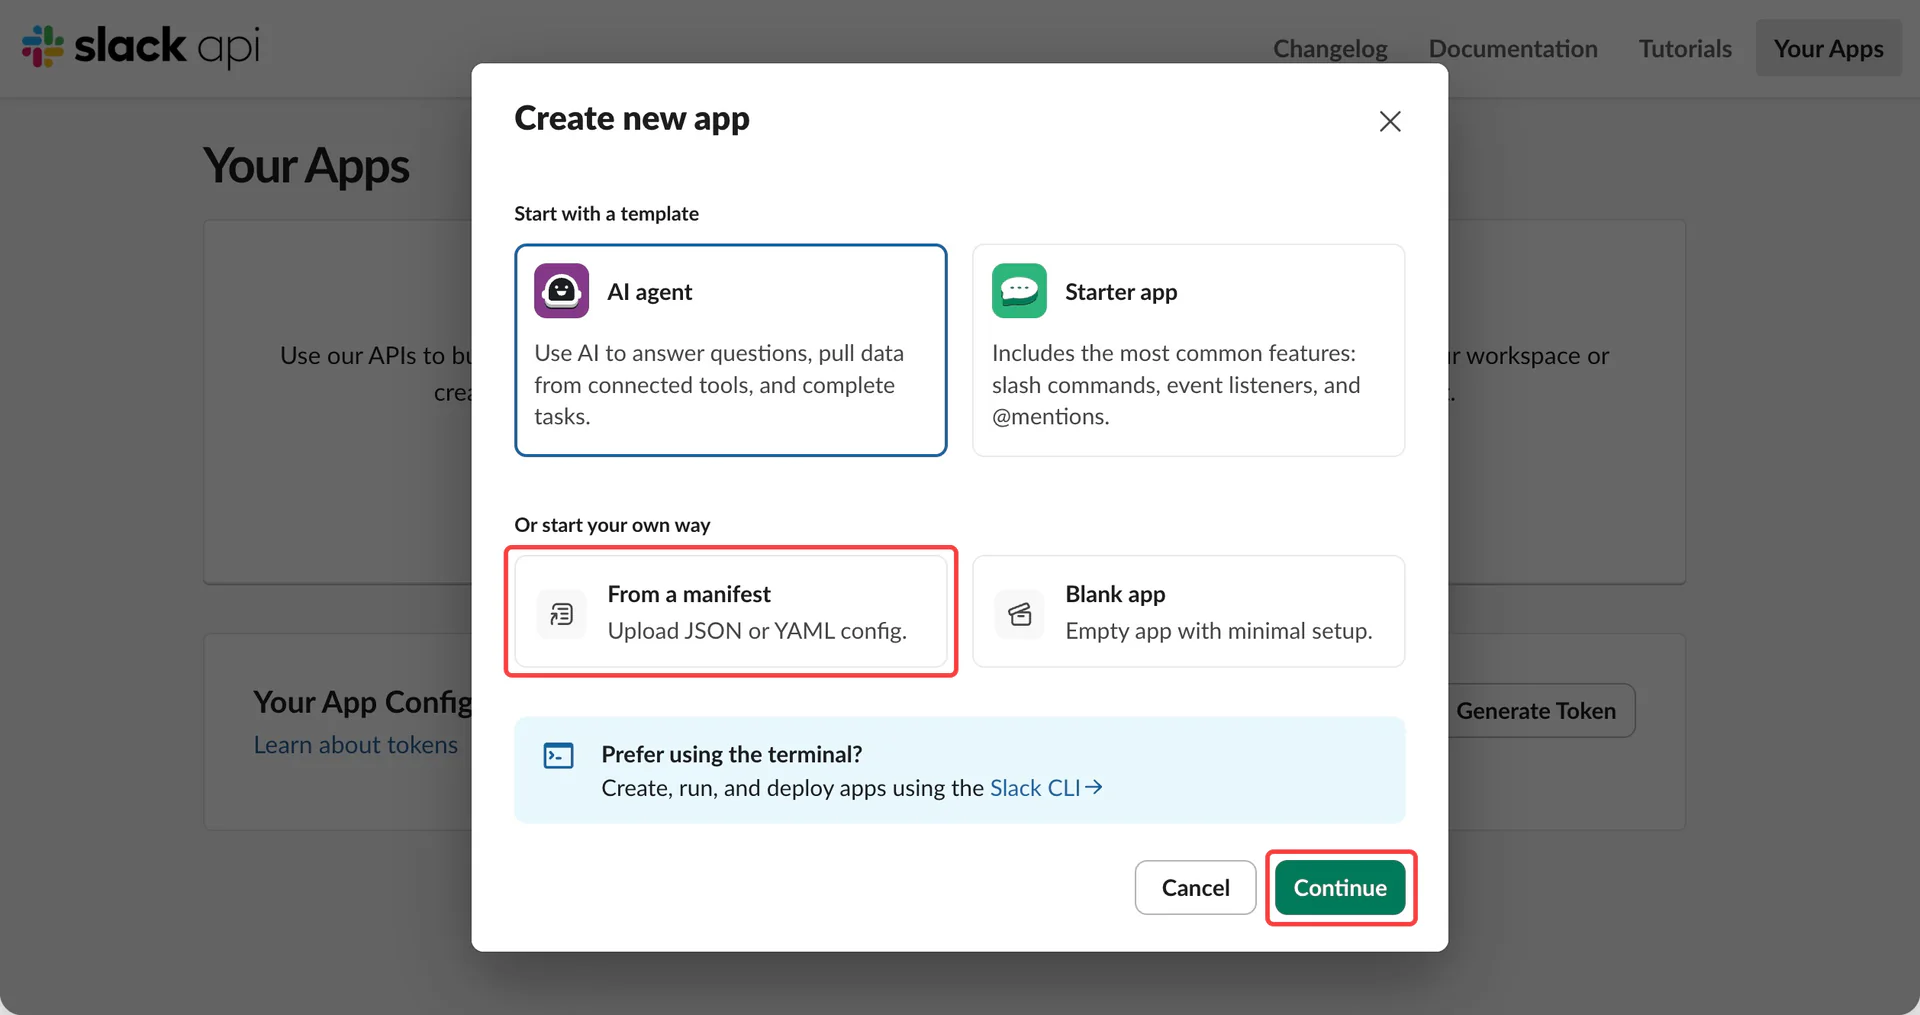
如需私聊,在 App Home 开启 Messages Tab,允许用户向 App 发送消息。
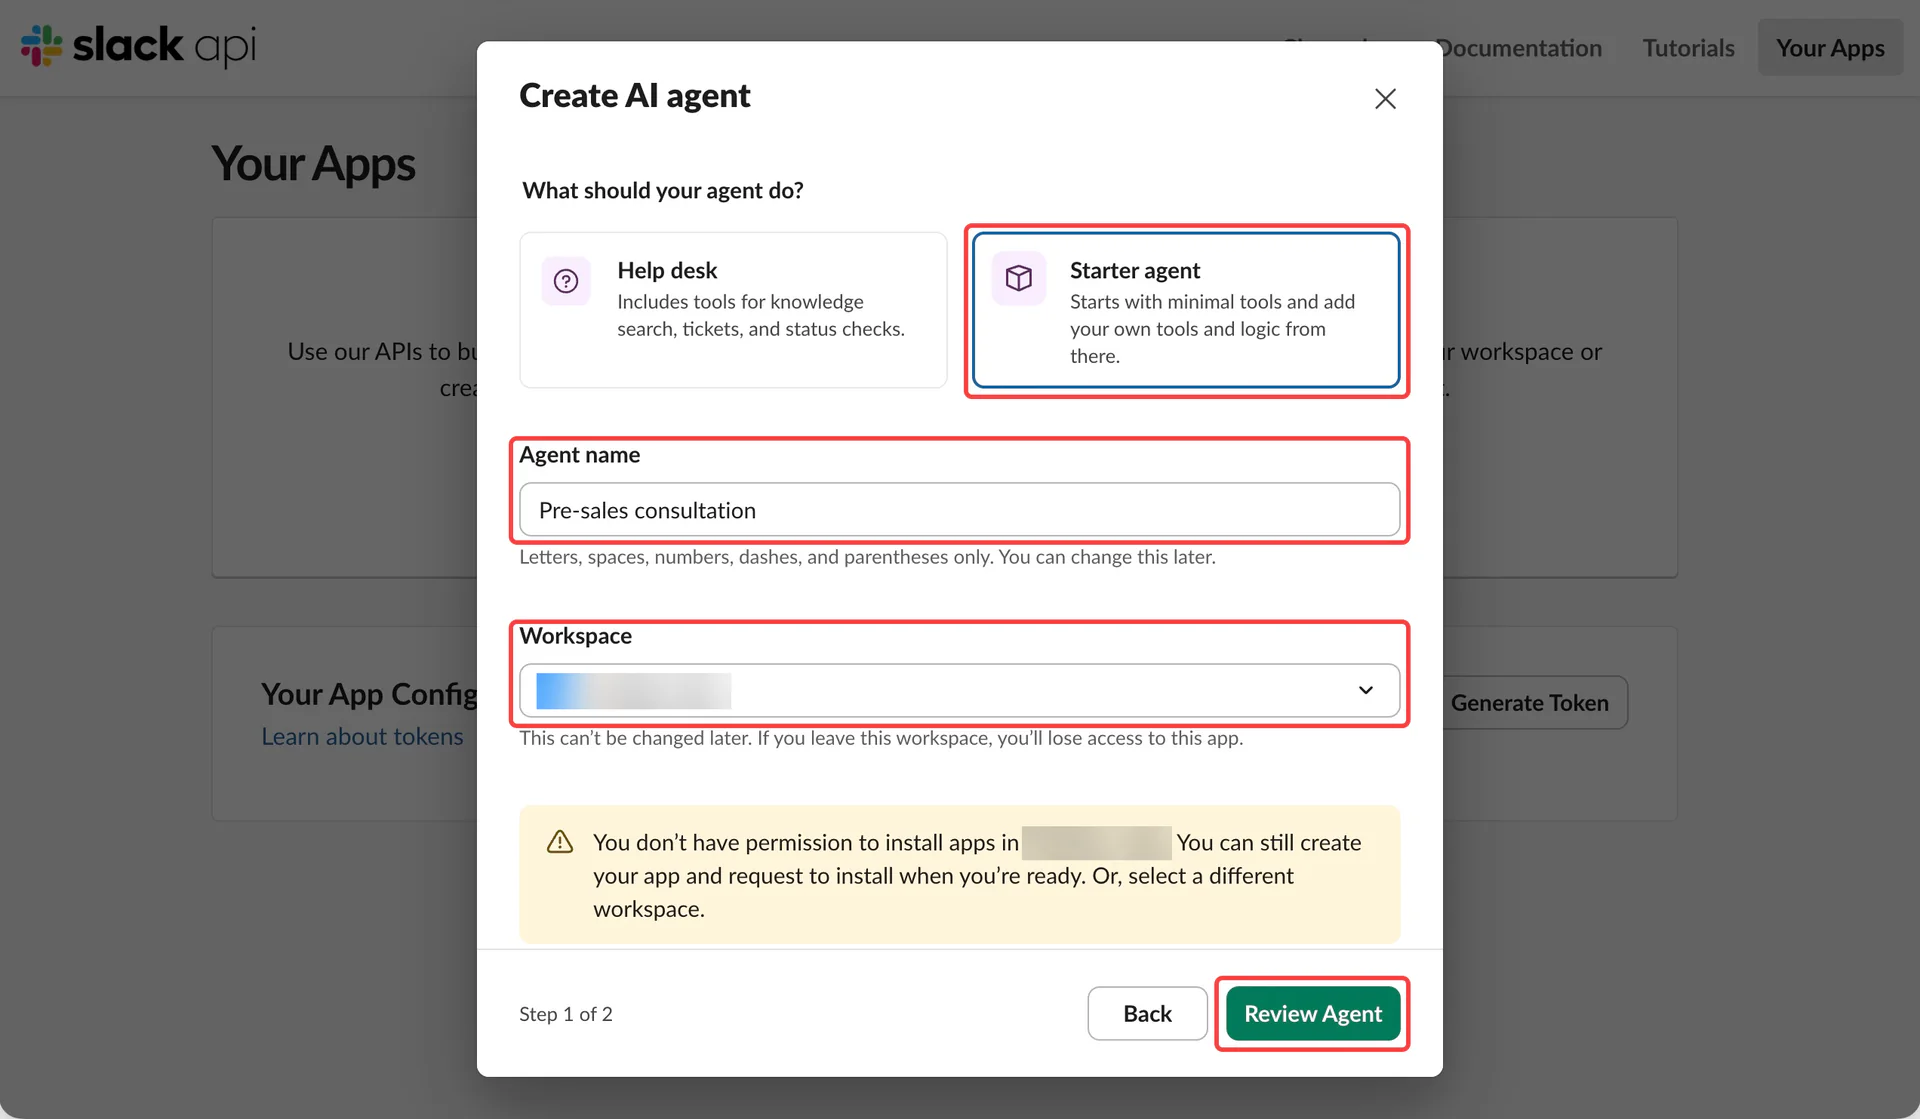
已选择 AI agent?查看对应创建流程
选择 Starter agent,填写应用名称和工作区,点击 Review Agent。
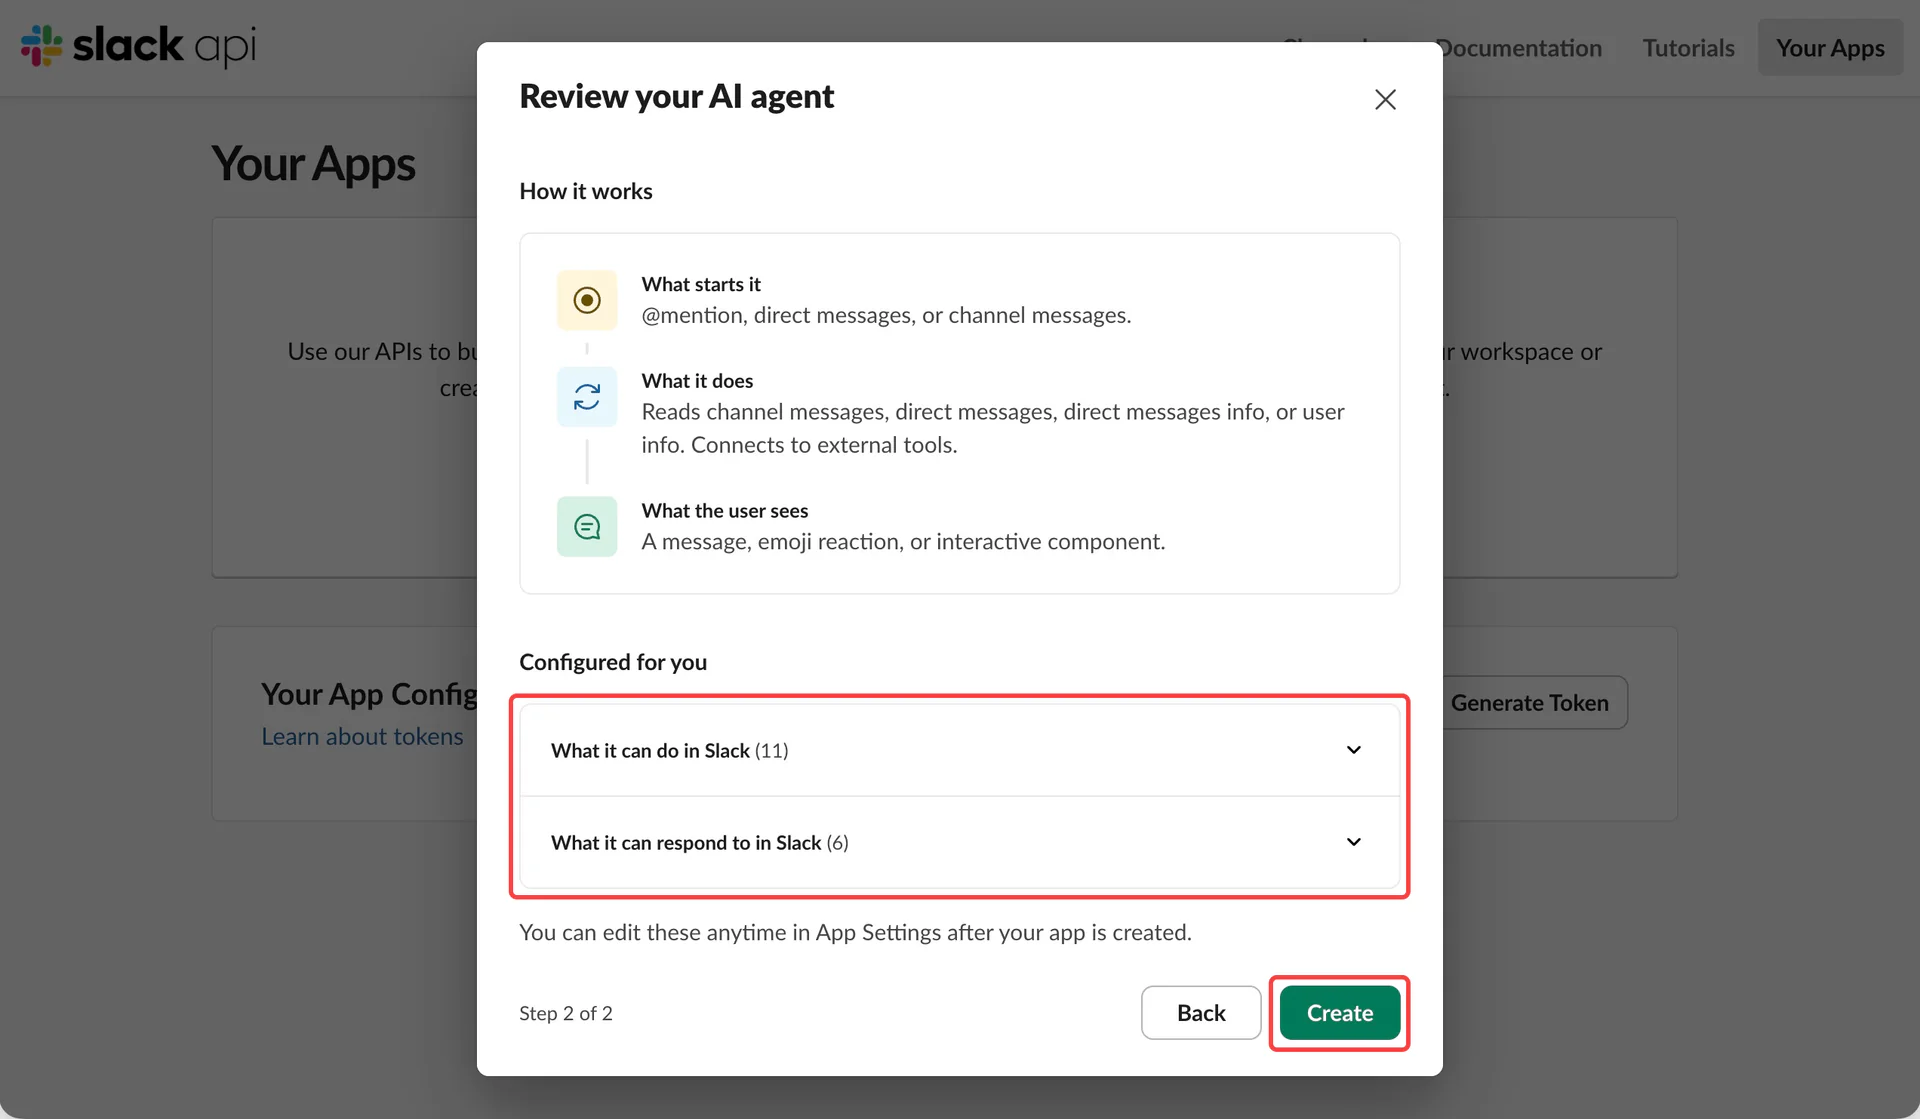
点击 Create。创建后在 App Manifest 中按上方 JSON 补齐权限与事件。
安装到工作区
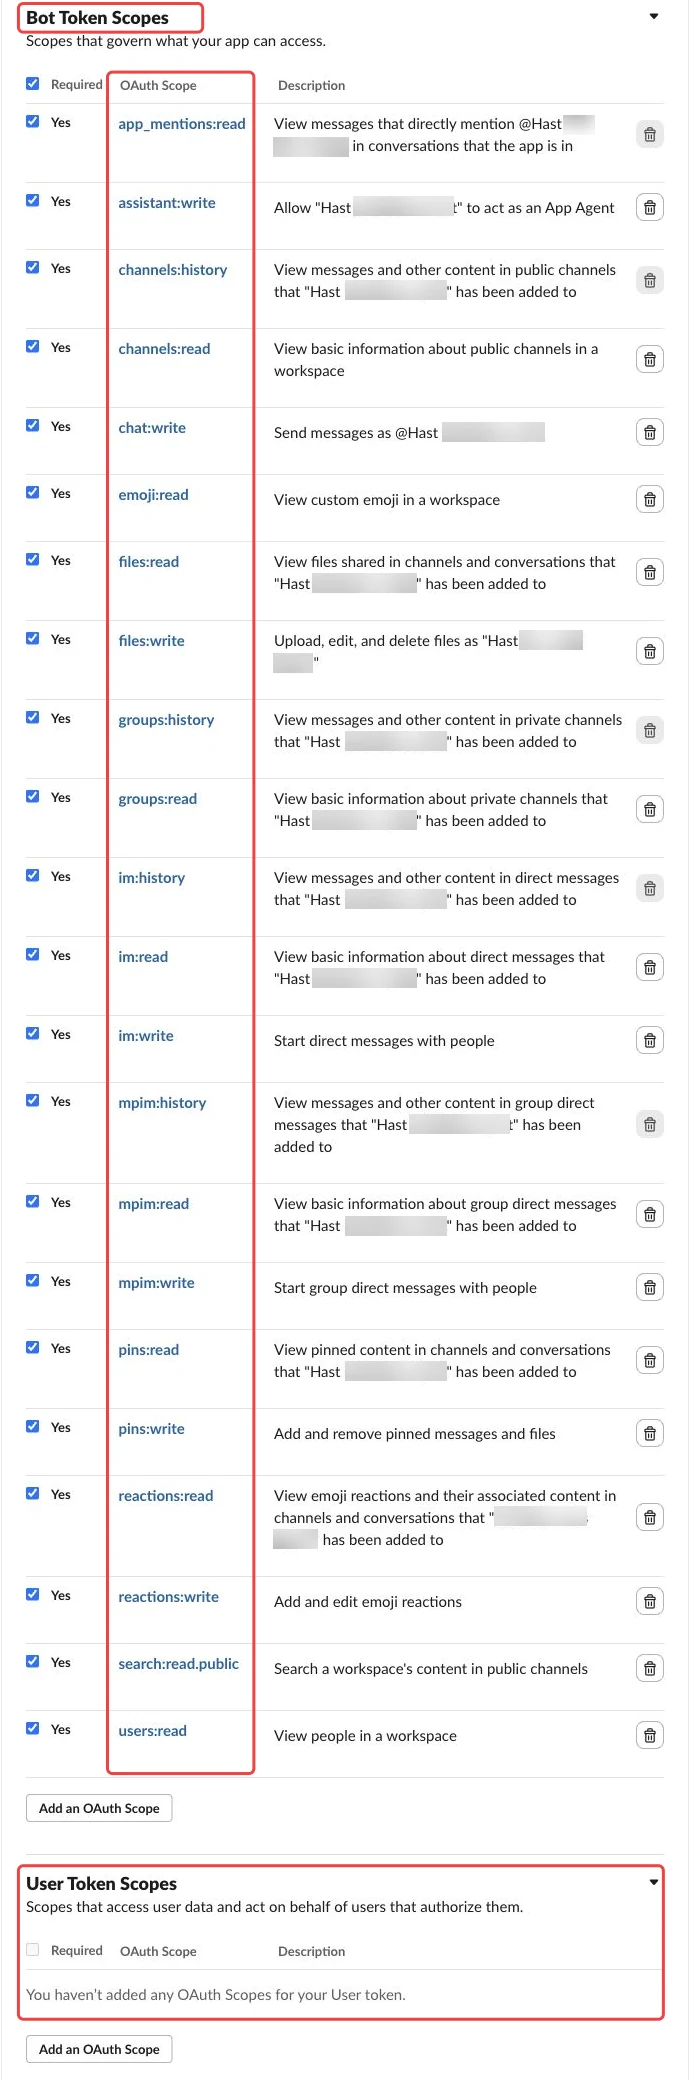
进入 OAuth & Permissions,在 Bot Token Scopes 中添加下表的 22 项权限,再点击 Install to Workspace。
| 用途 | 权限 |
|---|---|
| 提及与 Agent | app_mentions:read, assistant:write |
| 频道与消息 | channels:history, channels:read, groups:history, groups:read, chat:write |
| 私聊 | im:history, im:read, im:write |
| 多人私聊 | mpim:history, mpim:read, mpim:write |
| 附件 | files:read, files:write |
| 表情与回应 | emoji:read, reactions:read, reactions:write |
| 置顶 | pins:read, pins:write |
| 公开搜索与用户 | search:read.public, users:read |
User Token Scopes 留空。
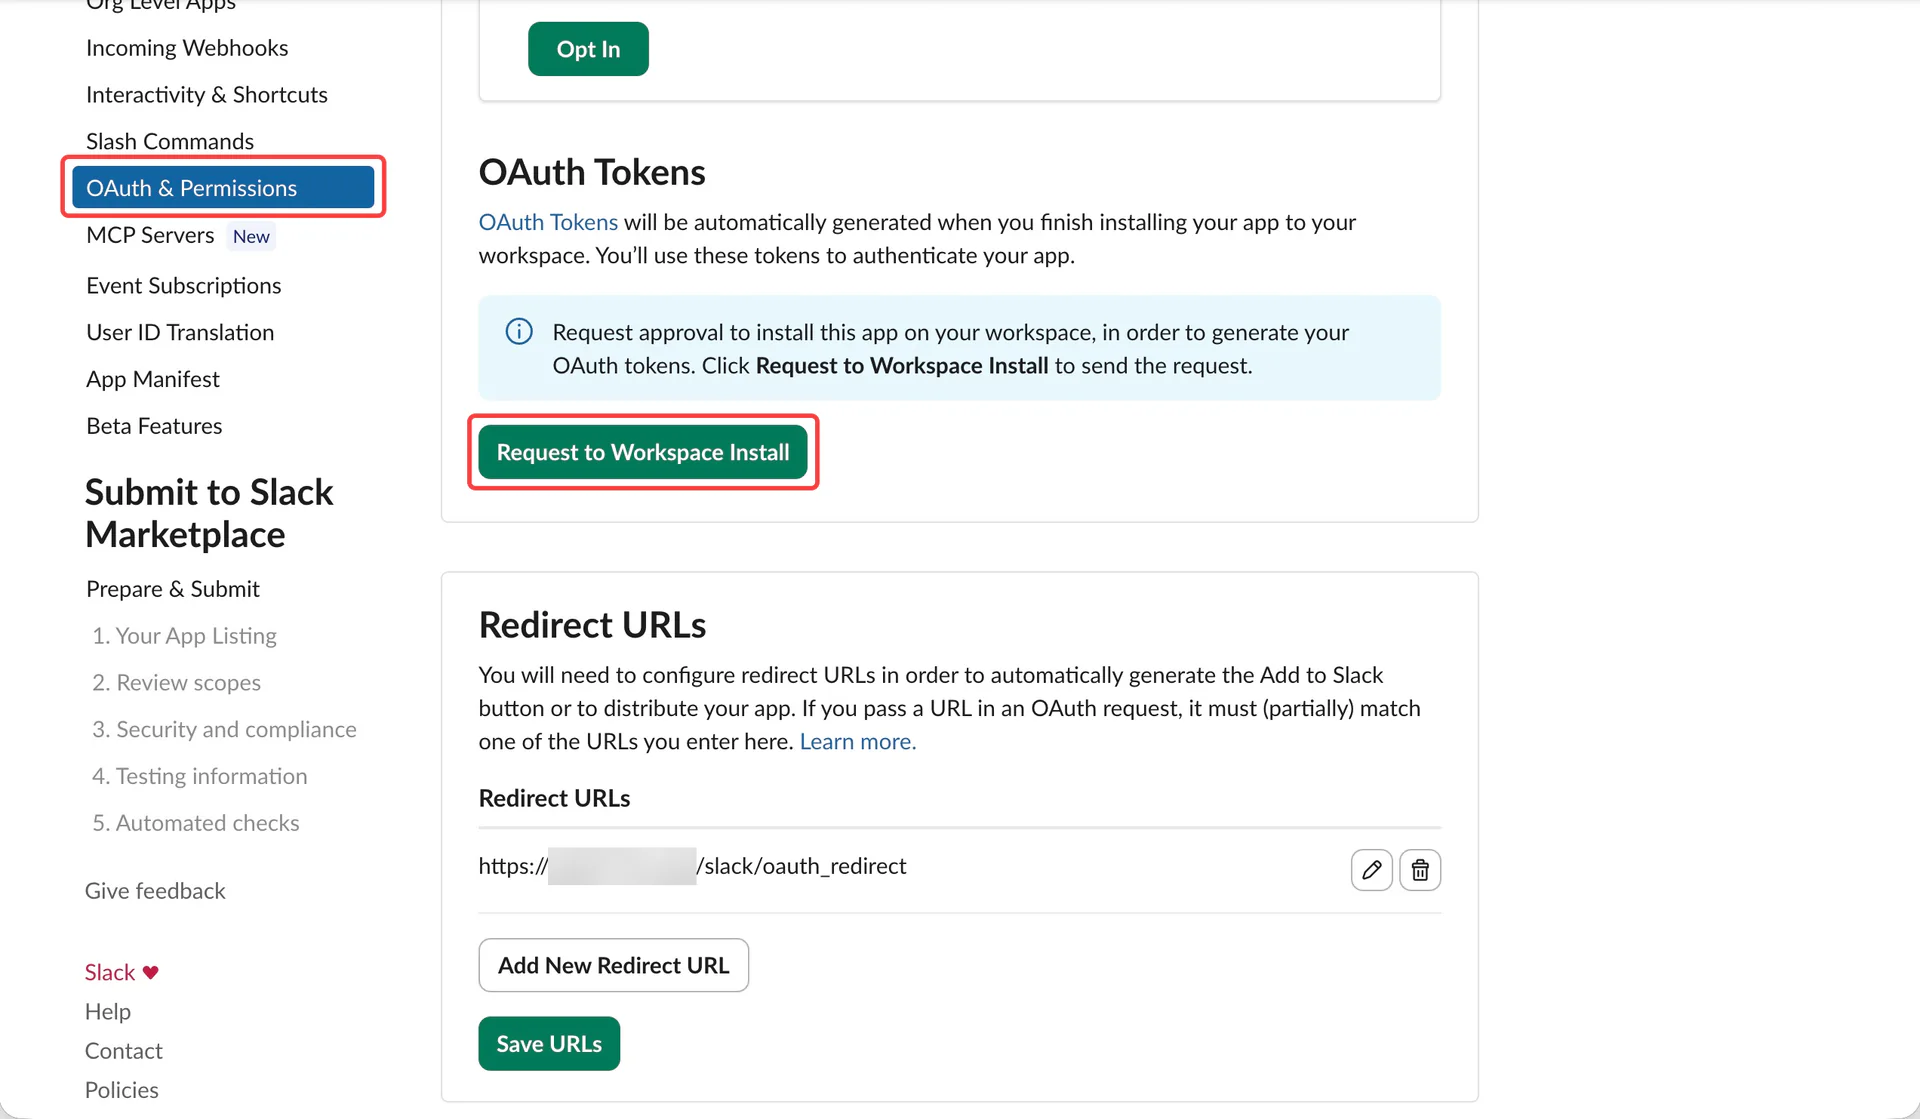
如果显示 Request to Workspace Install,点击申请安装。
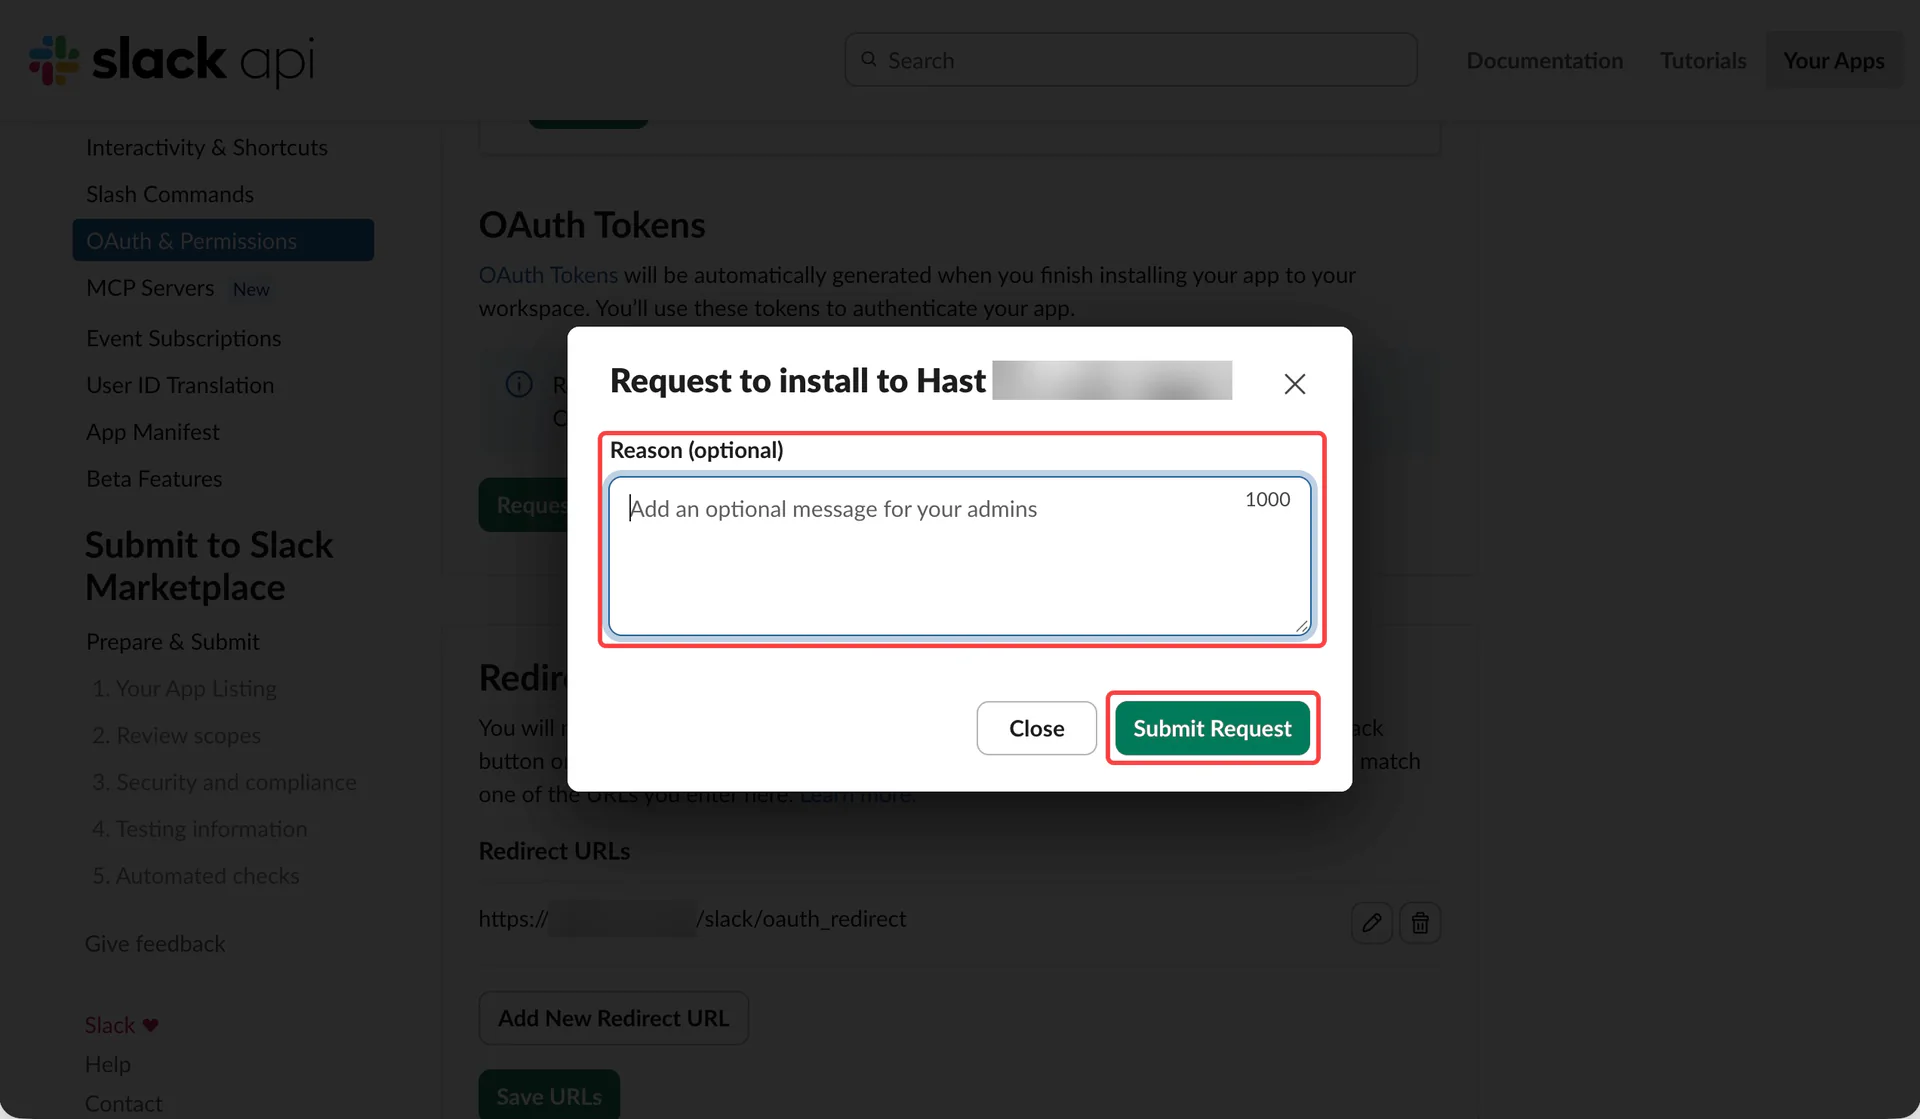
按需填写 Reason,点击 Submit Request,等待管理员批准。
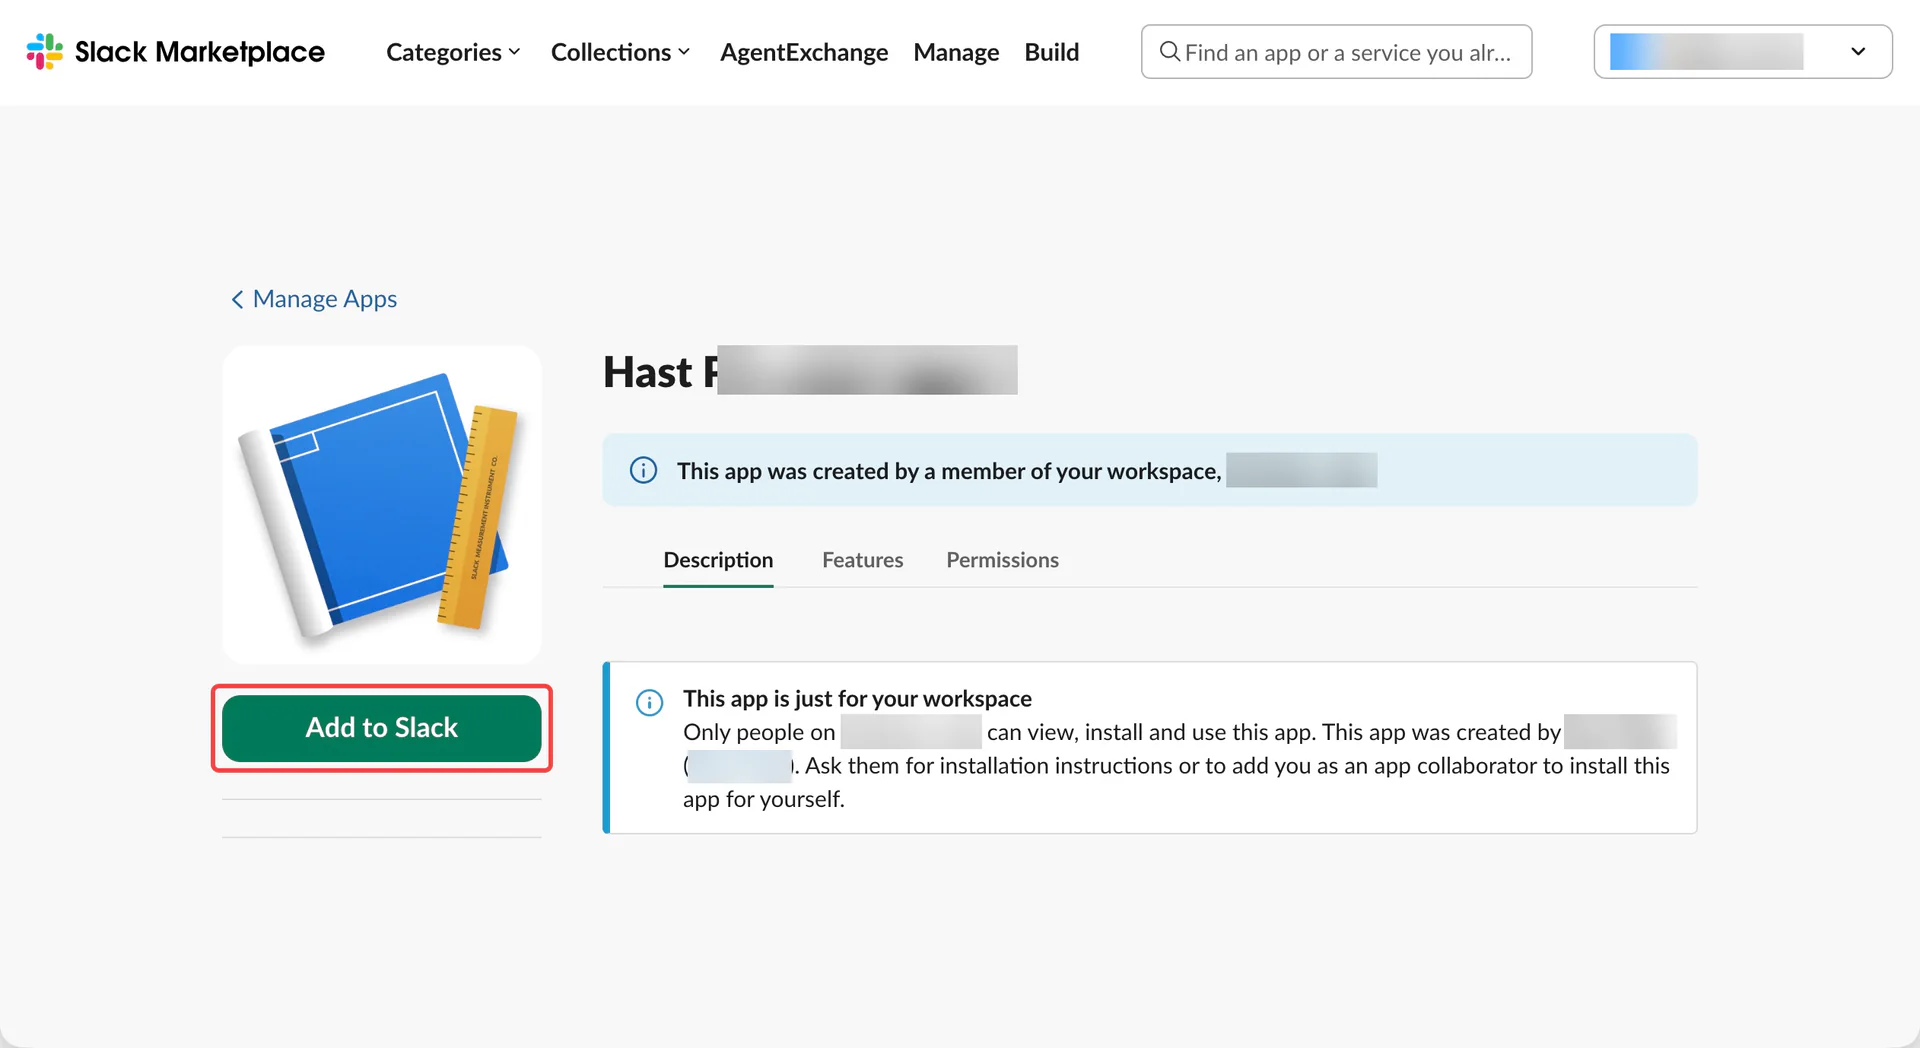
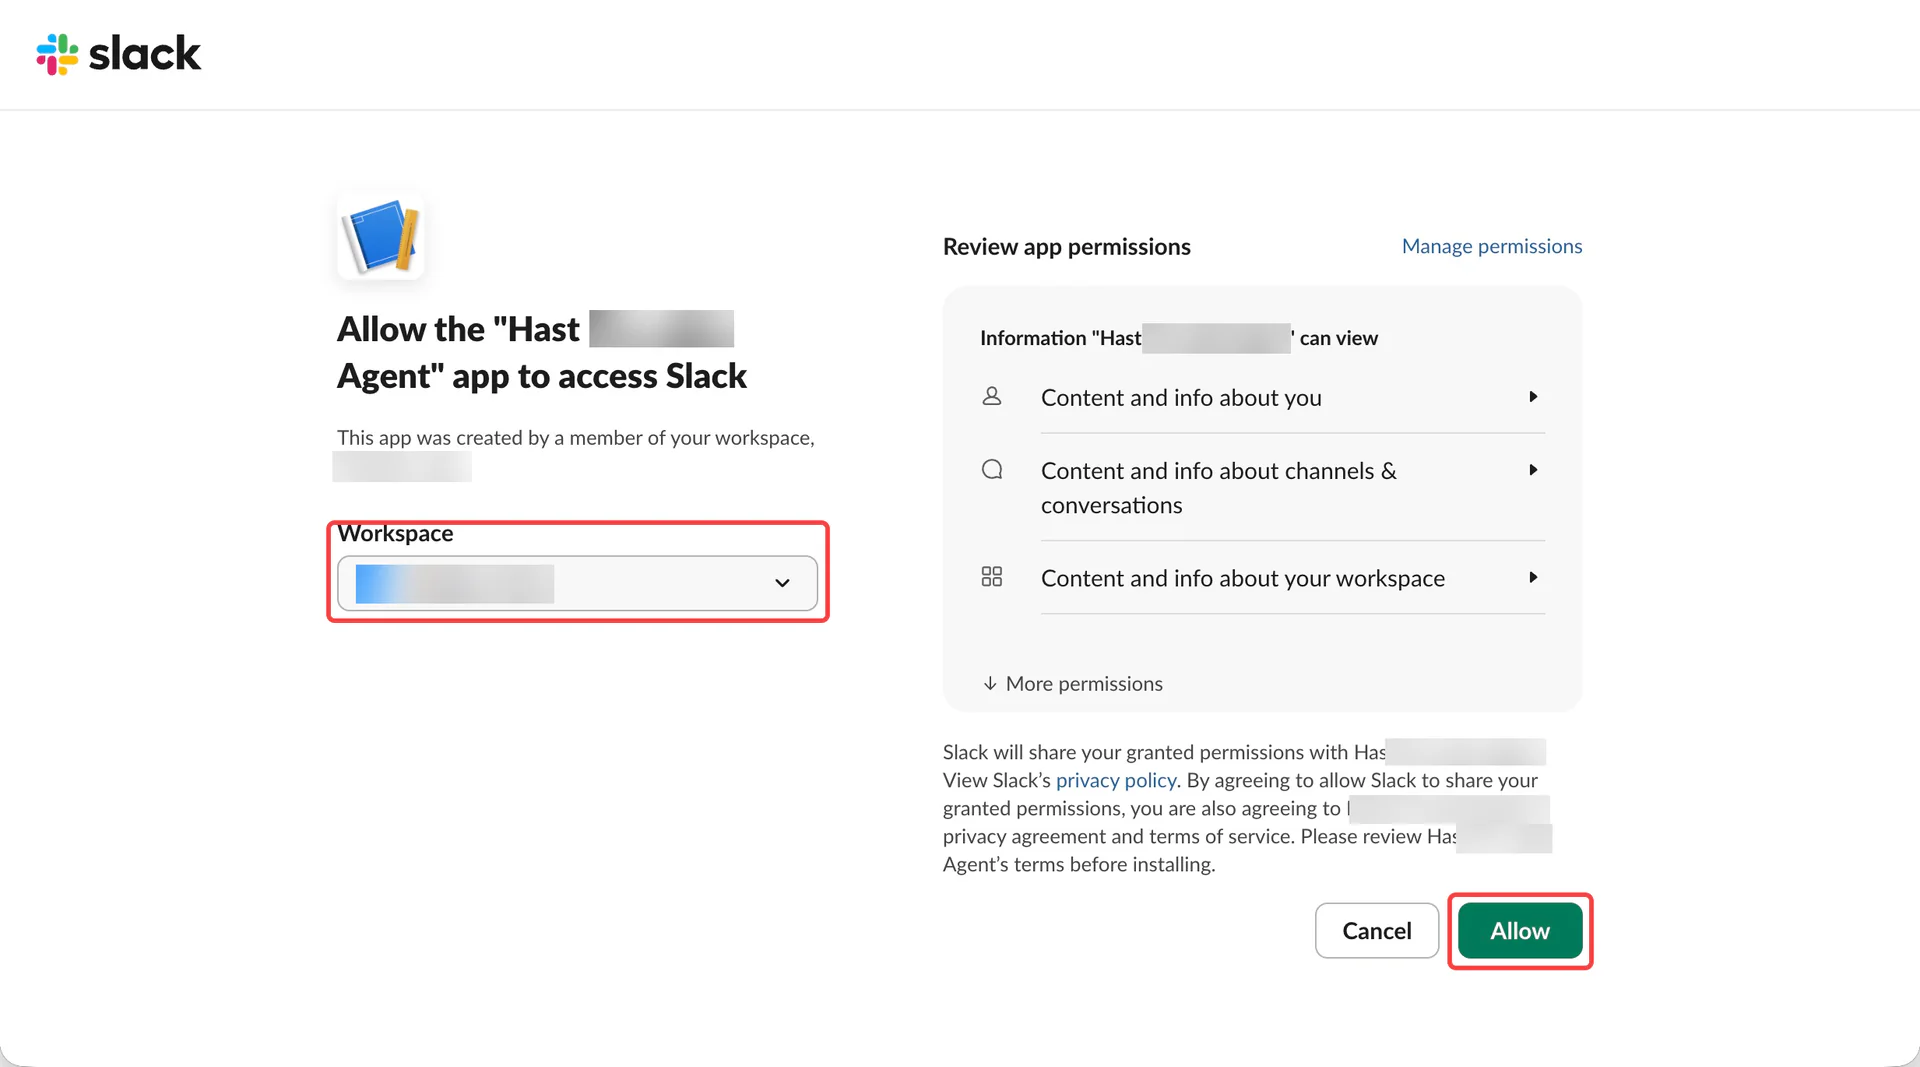
在应用安装页点击 Add to Slack;已进入授权页则跳过。
确认工作区和权限,点击 Allow。
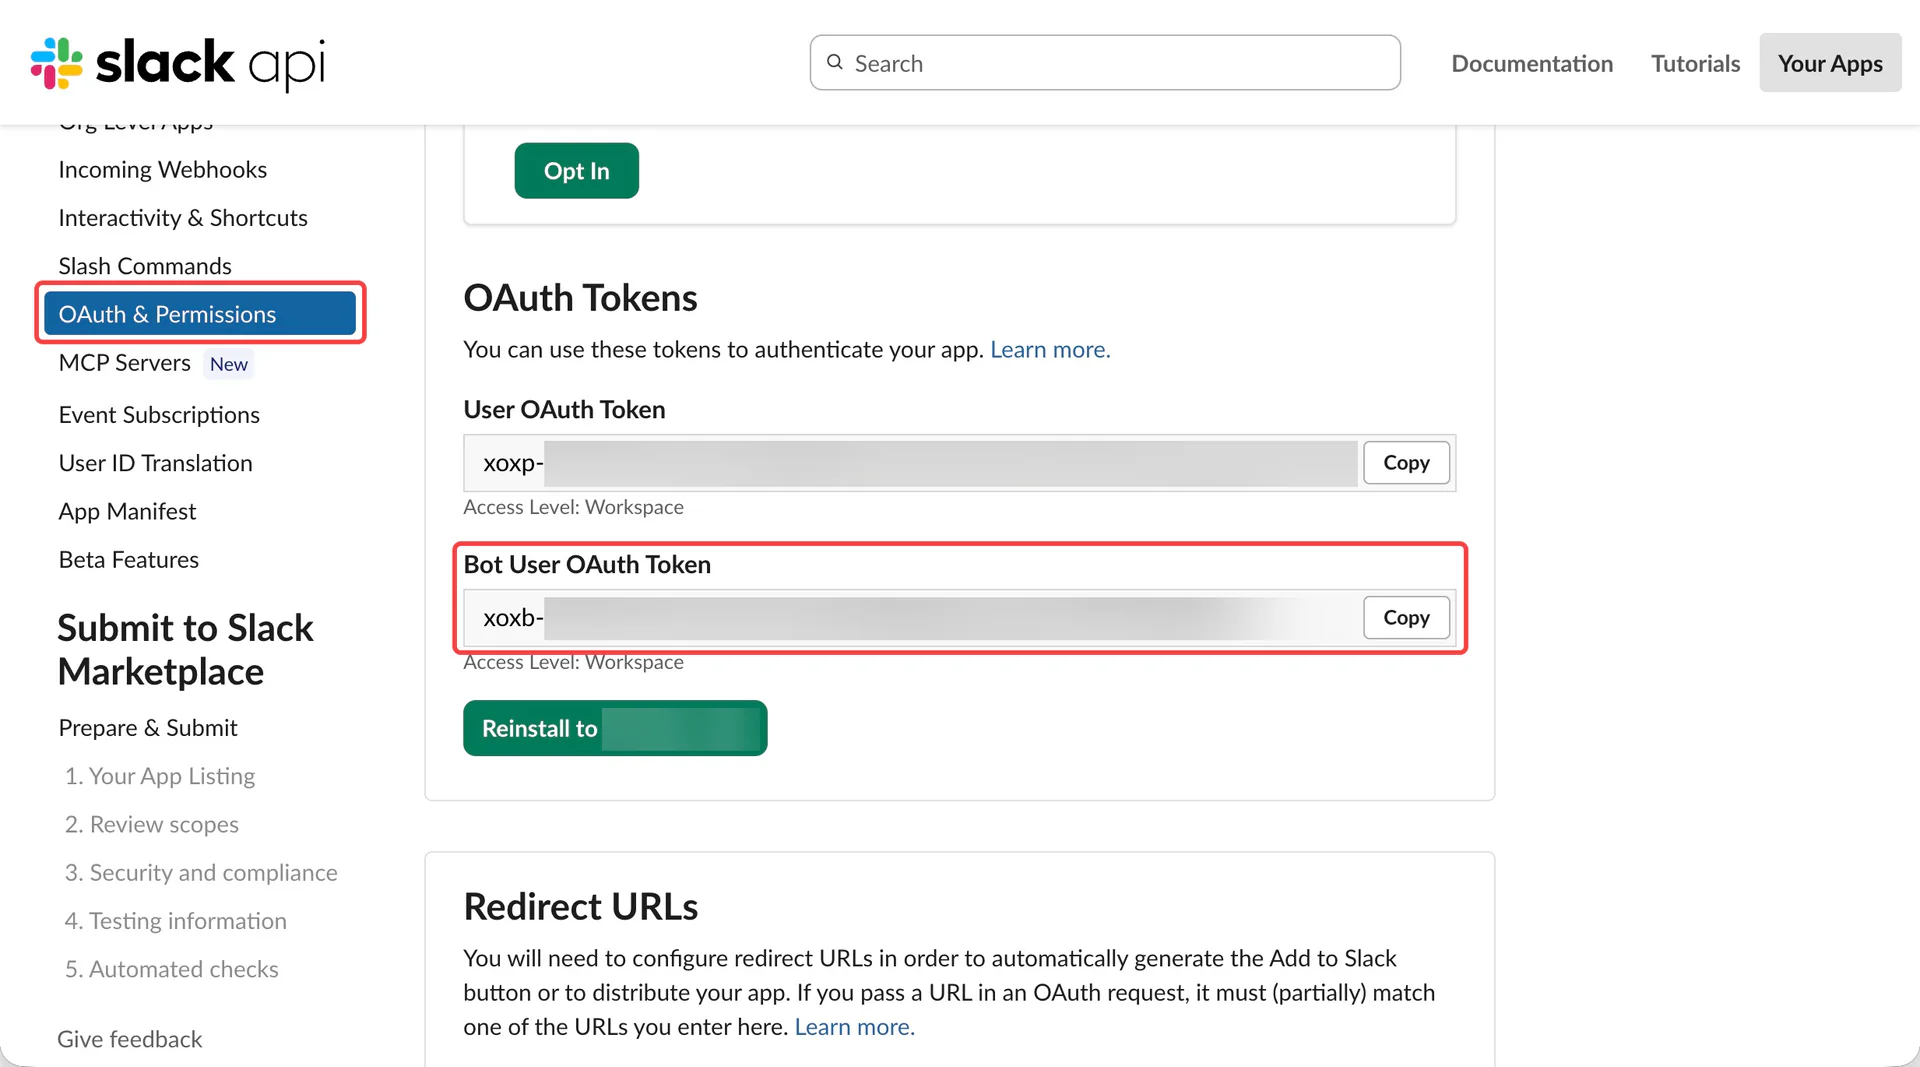
返回 OAuth & Permissions,复制 Bot User OAuth Token(以 xoxb- 开头)。
在 AIP 创建渠道
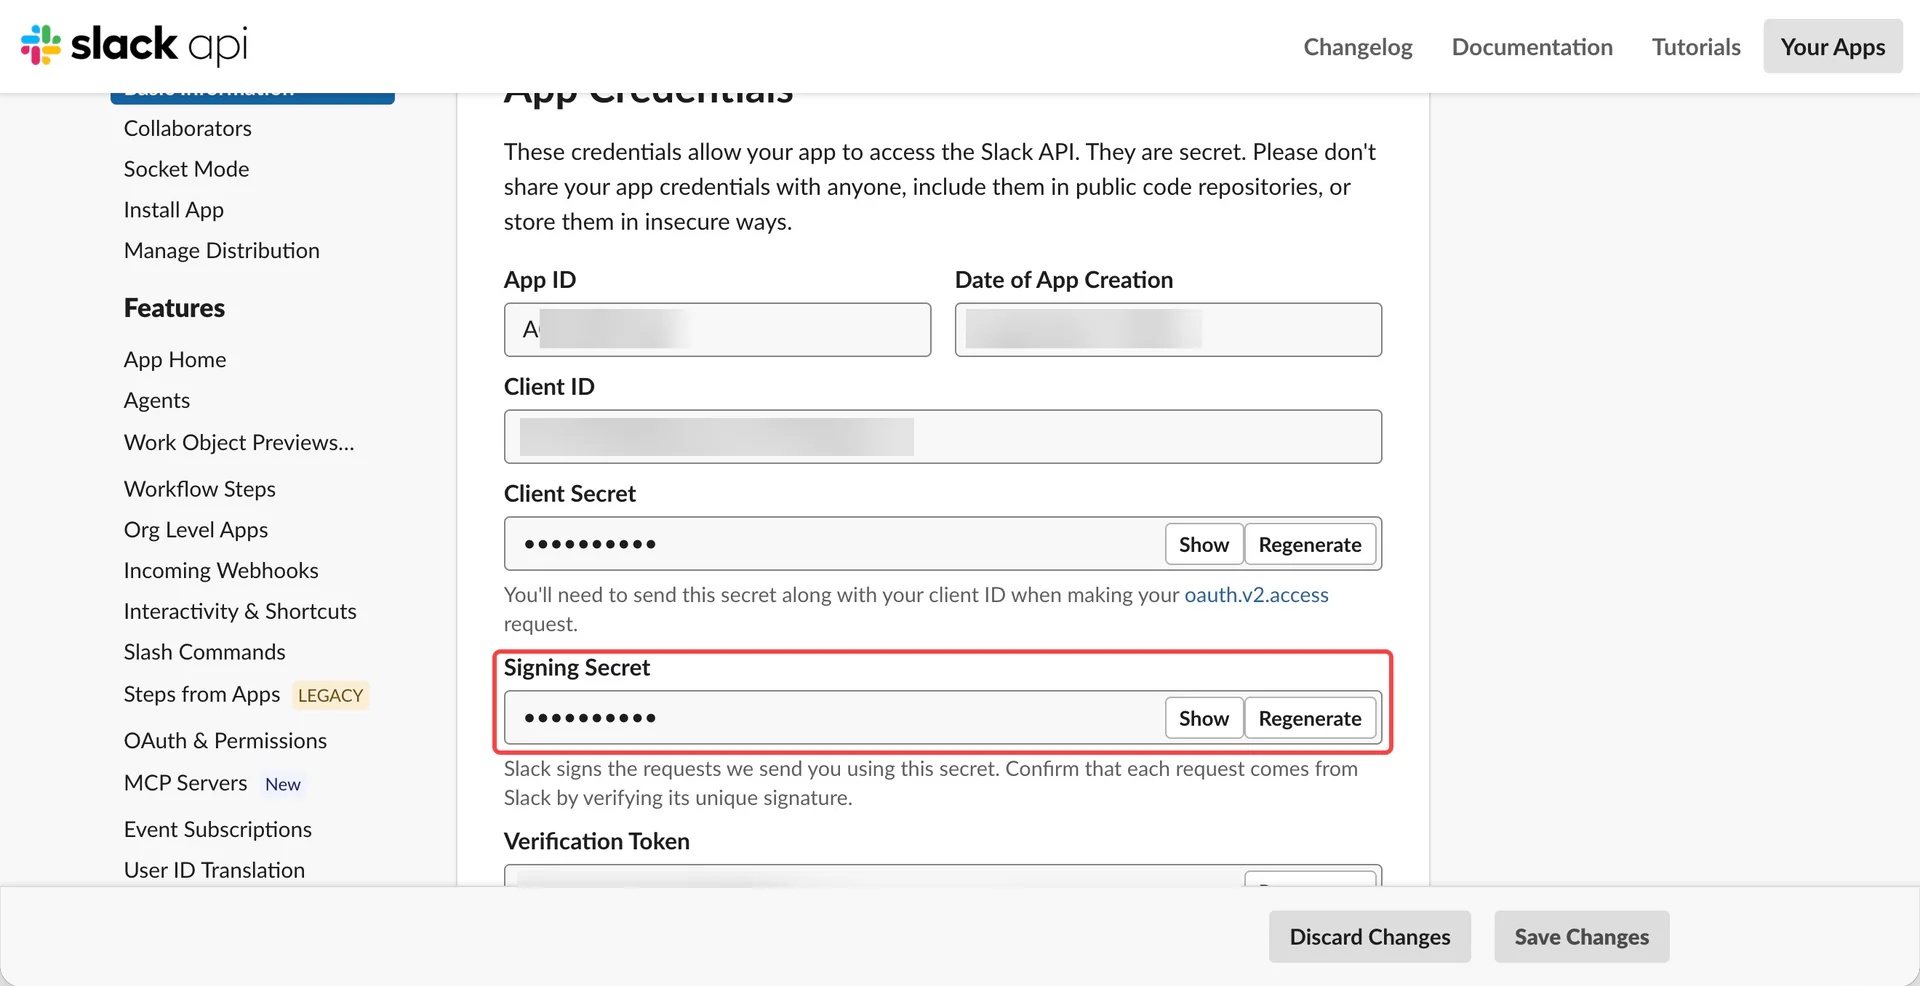
打开同一 App 的 Basic Information → App Credentials,点击 Signing Secret 旁的 Show 并复制。
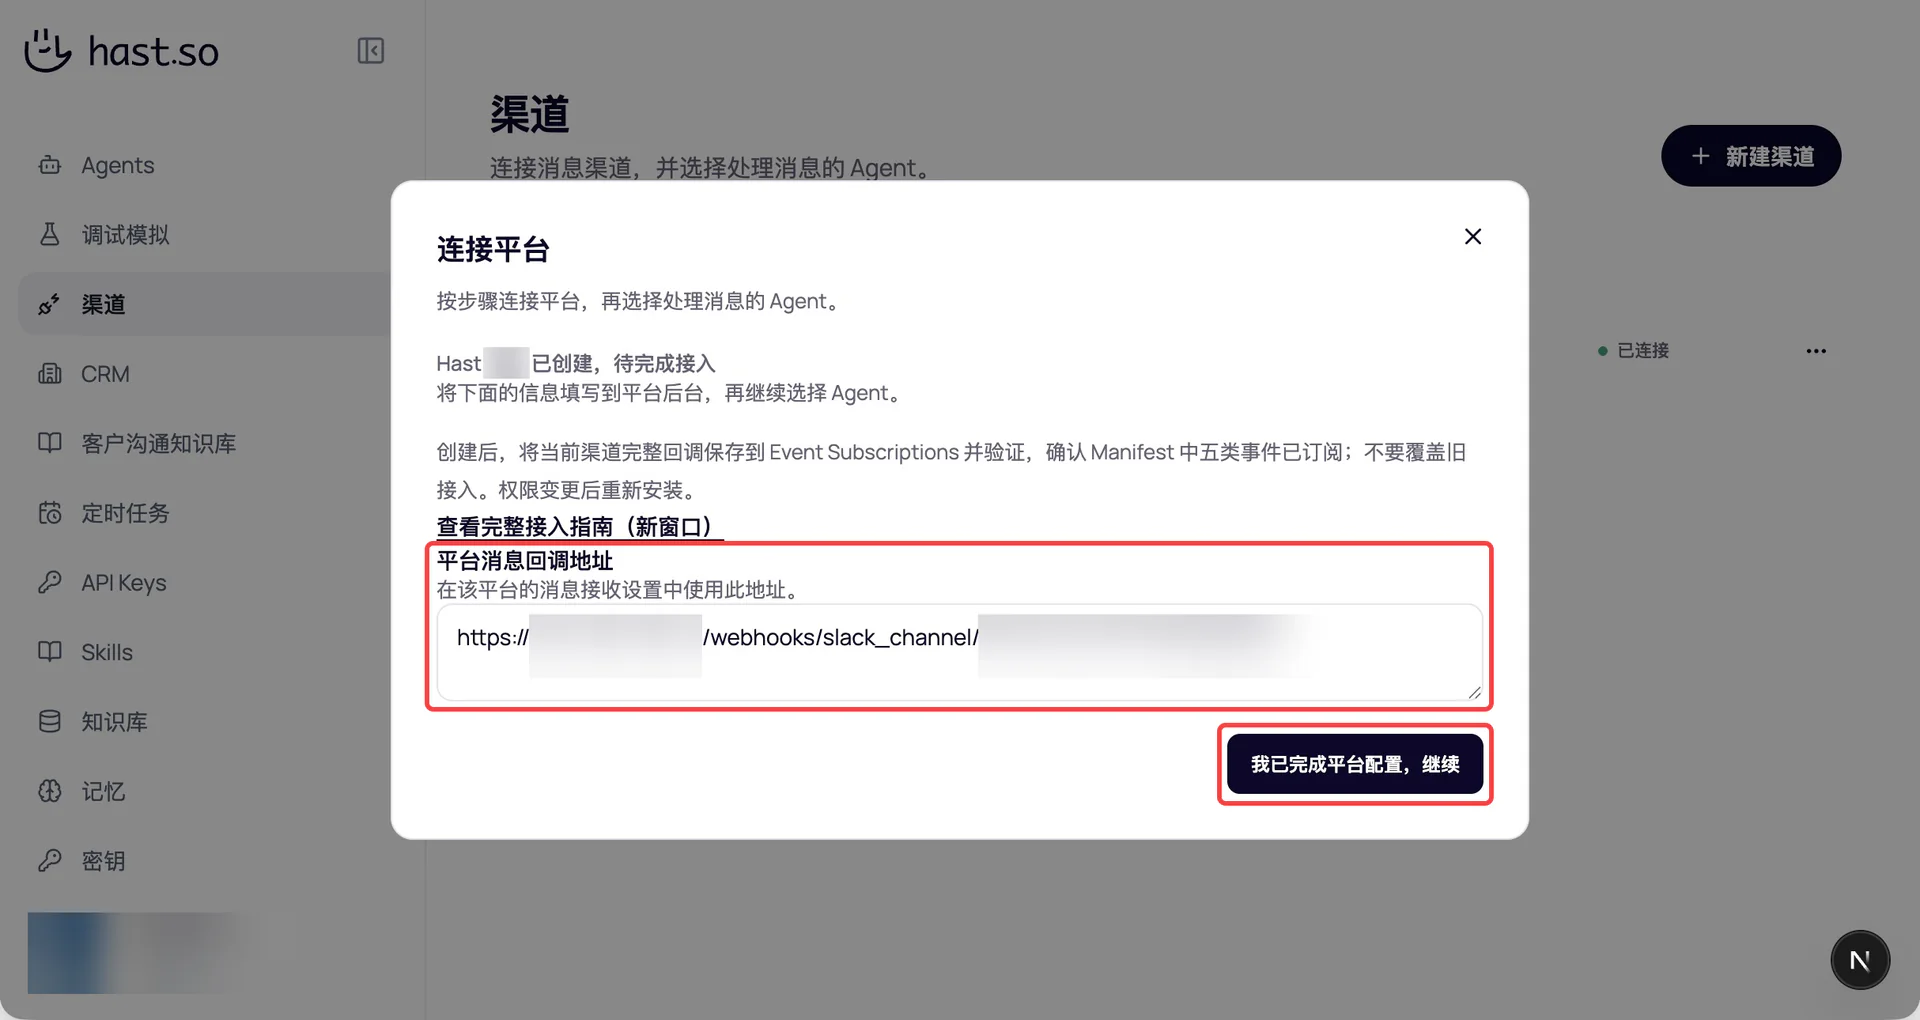
在 AIP 打开“渠道” → “新建渠道”,选择 Slack。填写渠道名称、Bot User OAuth Token 和 Signing Secret,点击“保存并配置回调”。
复制“平台消息回调地址”,进入下一步配置 Slack。
验证回调并保存事件
- 返回 Slack App 后台,确认
Socket Mode已关闭。 - 打开
Event Subscriptions,开启Enable Events。 - 将 AIP 的完整回调地址粘贴到
Request URL,等待显示Verified。 - 展开
Subscribe to bot events,确认包含下表中的五个事件。 - 点击
Save Changes。如果 Slack 提示重新安装,按提示完成安装。
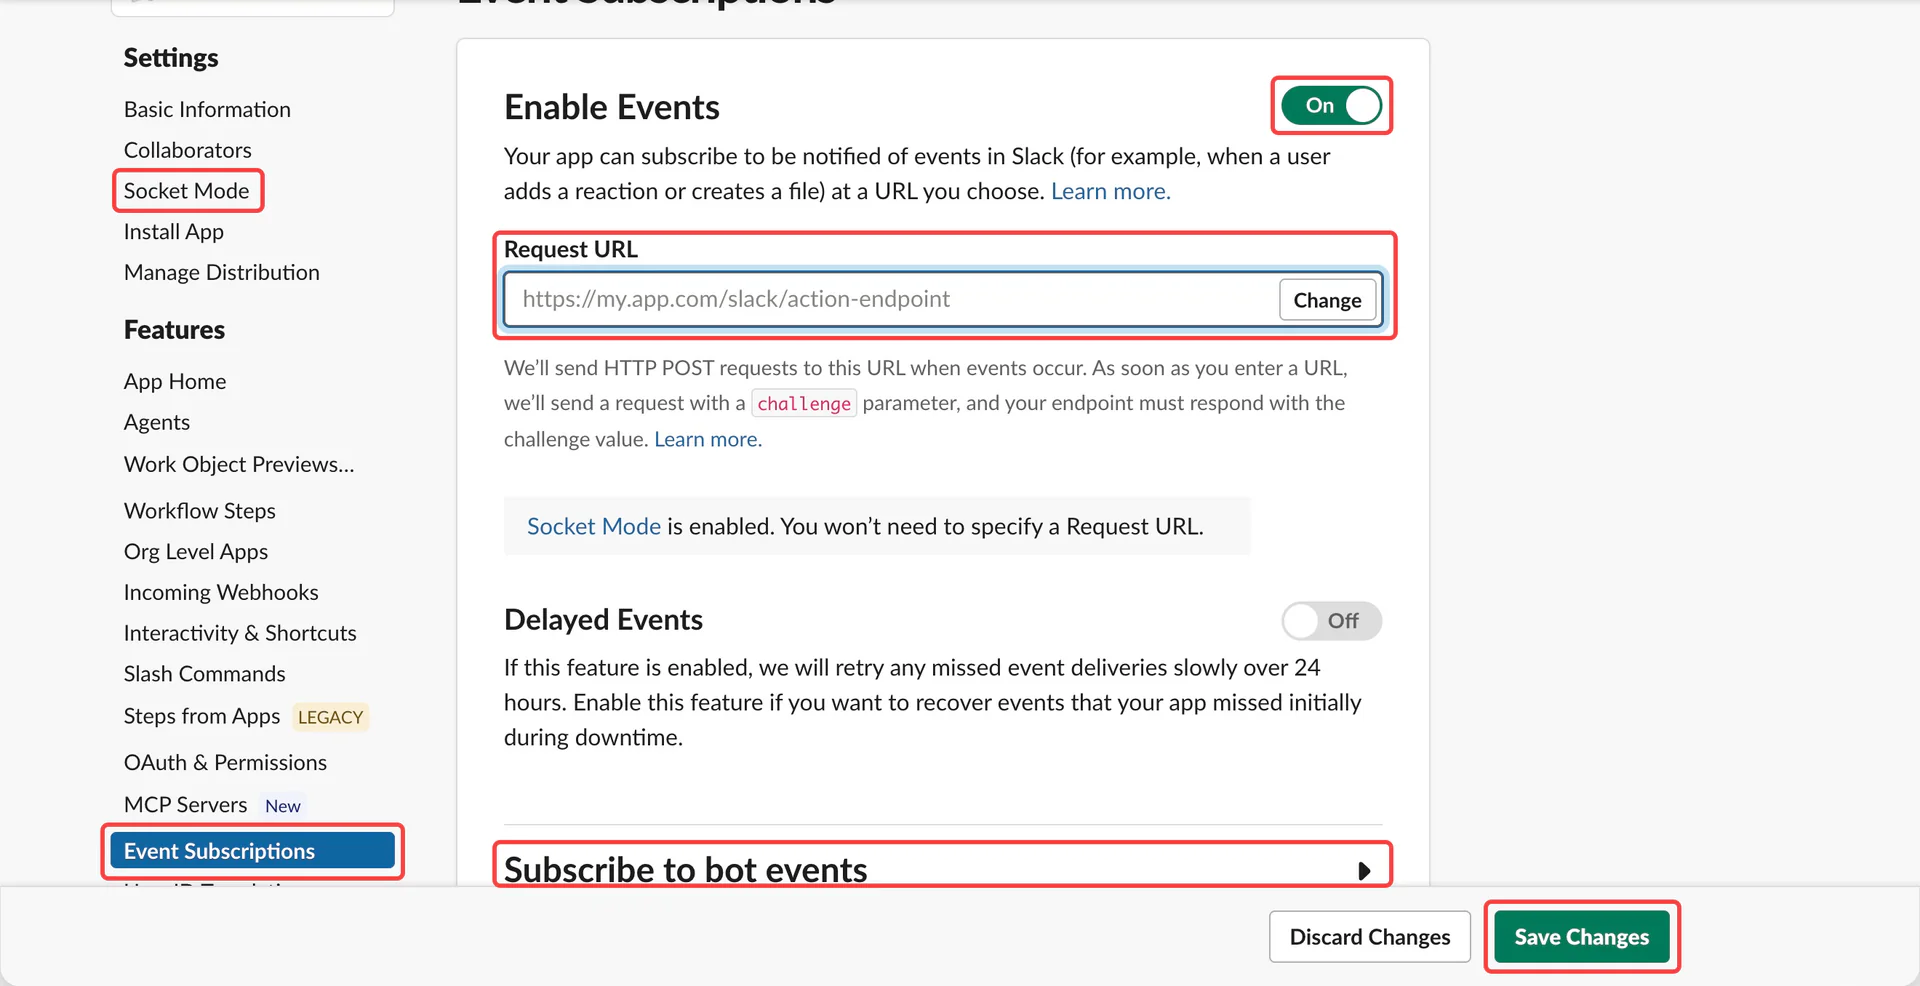
| Bot event | 接收的消息 |
|---|---|
app_mention | 提及 Bot 的消息 |
message.channels | 公开频道消息 |
message.groups | 私有频道消息 |
message.im | 私聊消息 |
message.mpim | 多人私聊消息 |
将 Bot 邀请到测试频道,才能接收消息和读取该频道历史。
选择 Agent 并测试
回到 AIP,点击“我已完成平台配置,继续”,选择已启用的 Agent 并保存。
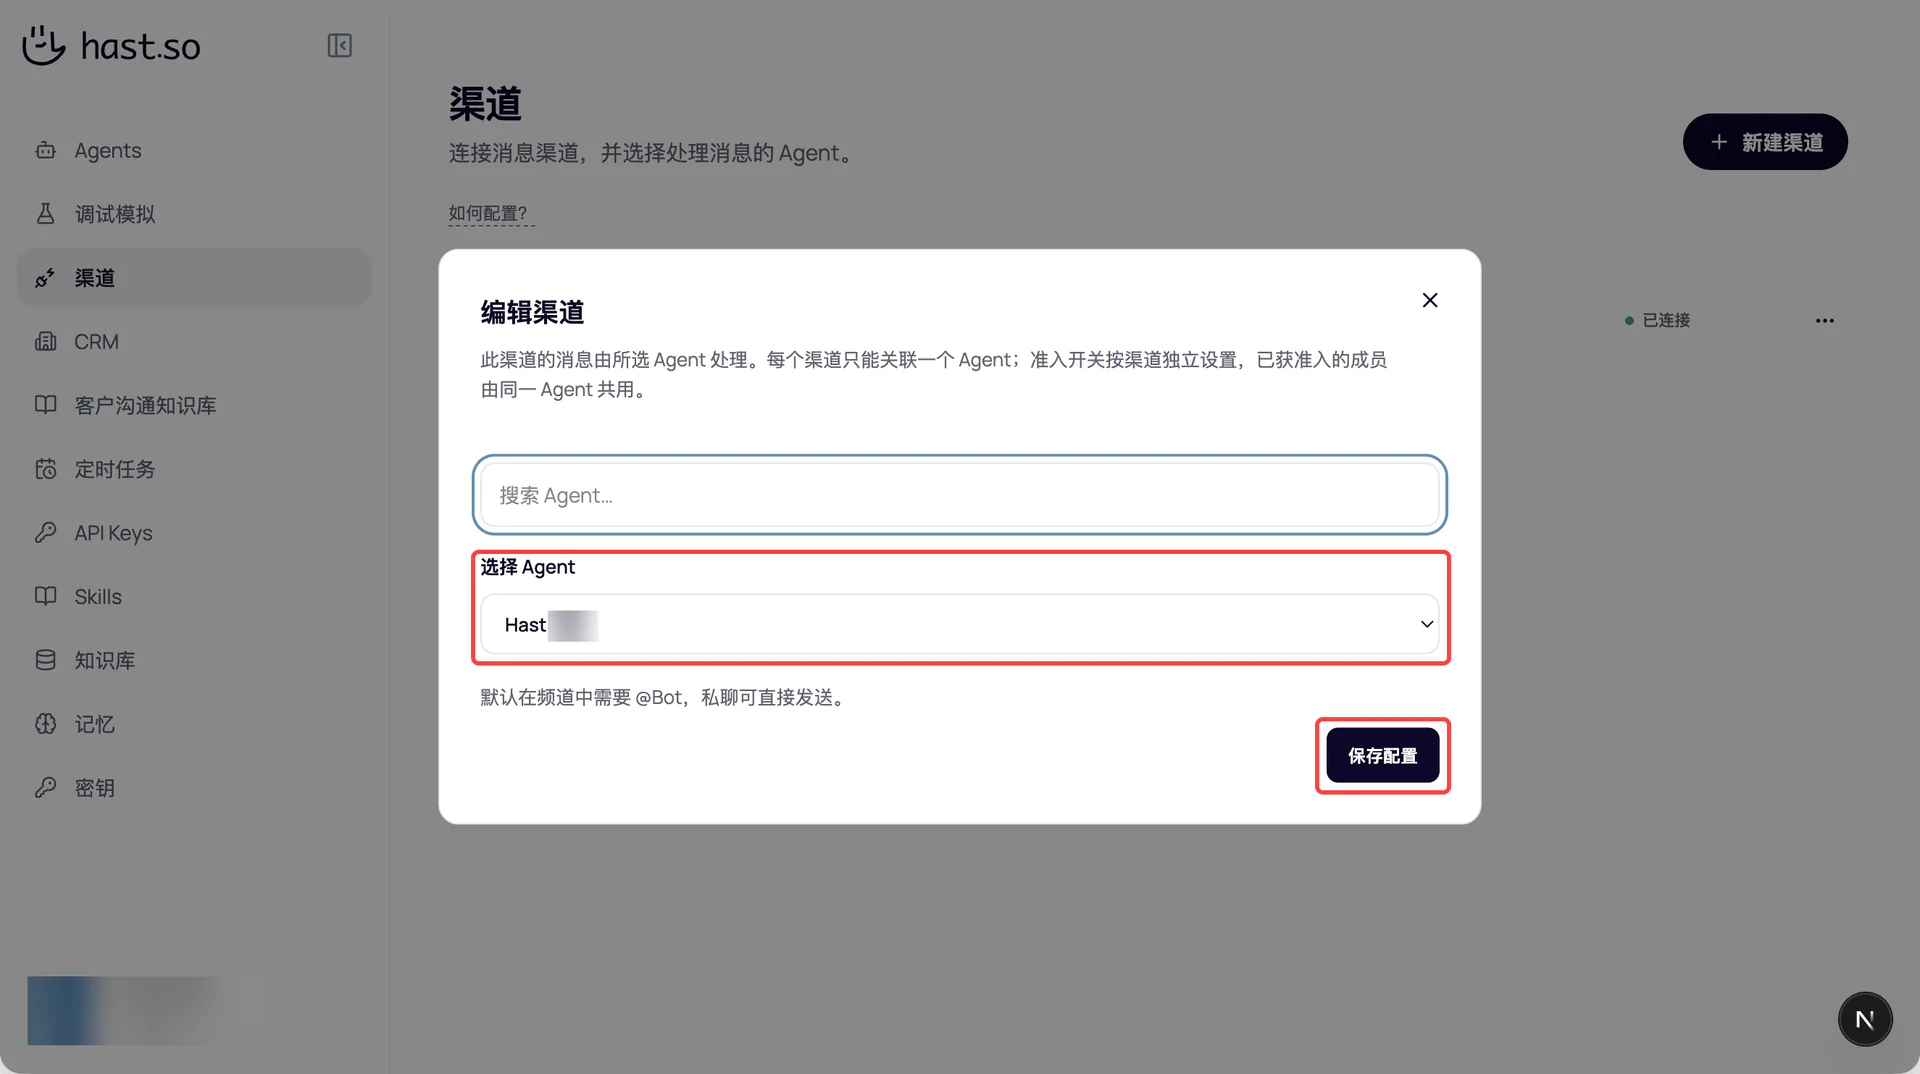
在测试频道 @你的 Bot,发送“你好”,确认收到回复。
需要收发附件?
在 Agent 编辑页设置并保存:
- “文件操作权限”:可写工作区。
- “可用能力”:开启“执行命令”和“访问网络”。
发送一个测试文件,@Bot 请求读取,再让它返回文件,确认收发正常。
设置回复触发规则
在“Slack 回复触发规则”中设置免 @ 回复:
| 设置 | 填写内容 |
|---|---|
| 无需 @智能体的频道 | Channel ID |
| 无需 @智能体的发送者 | Slack User ID 或 Bot ID |
多个 ID 用换行或逗号分隔。
Bot 加入频道后,@Bot 或匹配任一免 @ 规则即可触发回复。自动告警可填写告警机器人的 ID;Bot 会忽略自己的消息。
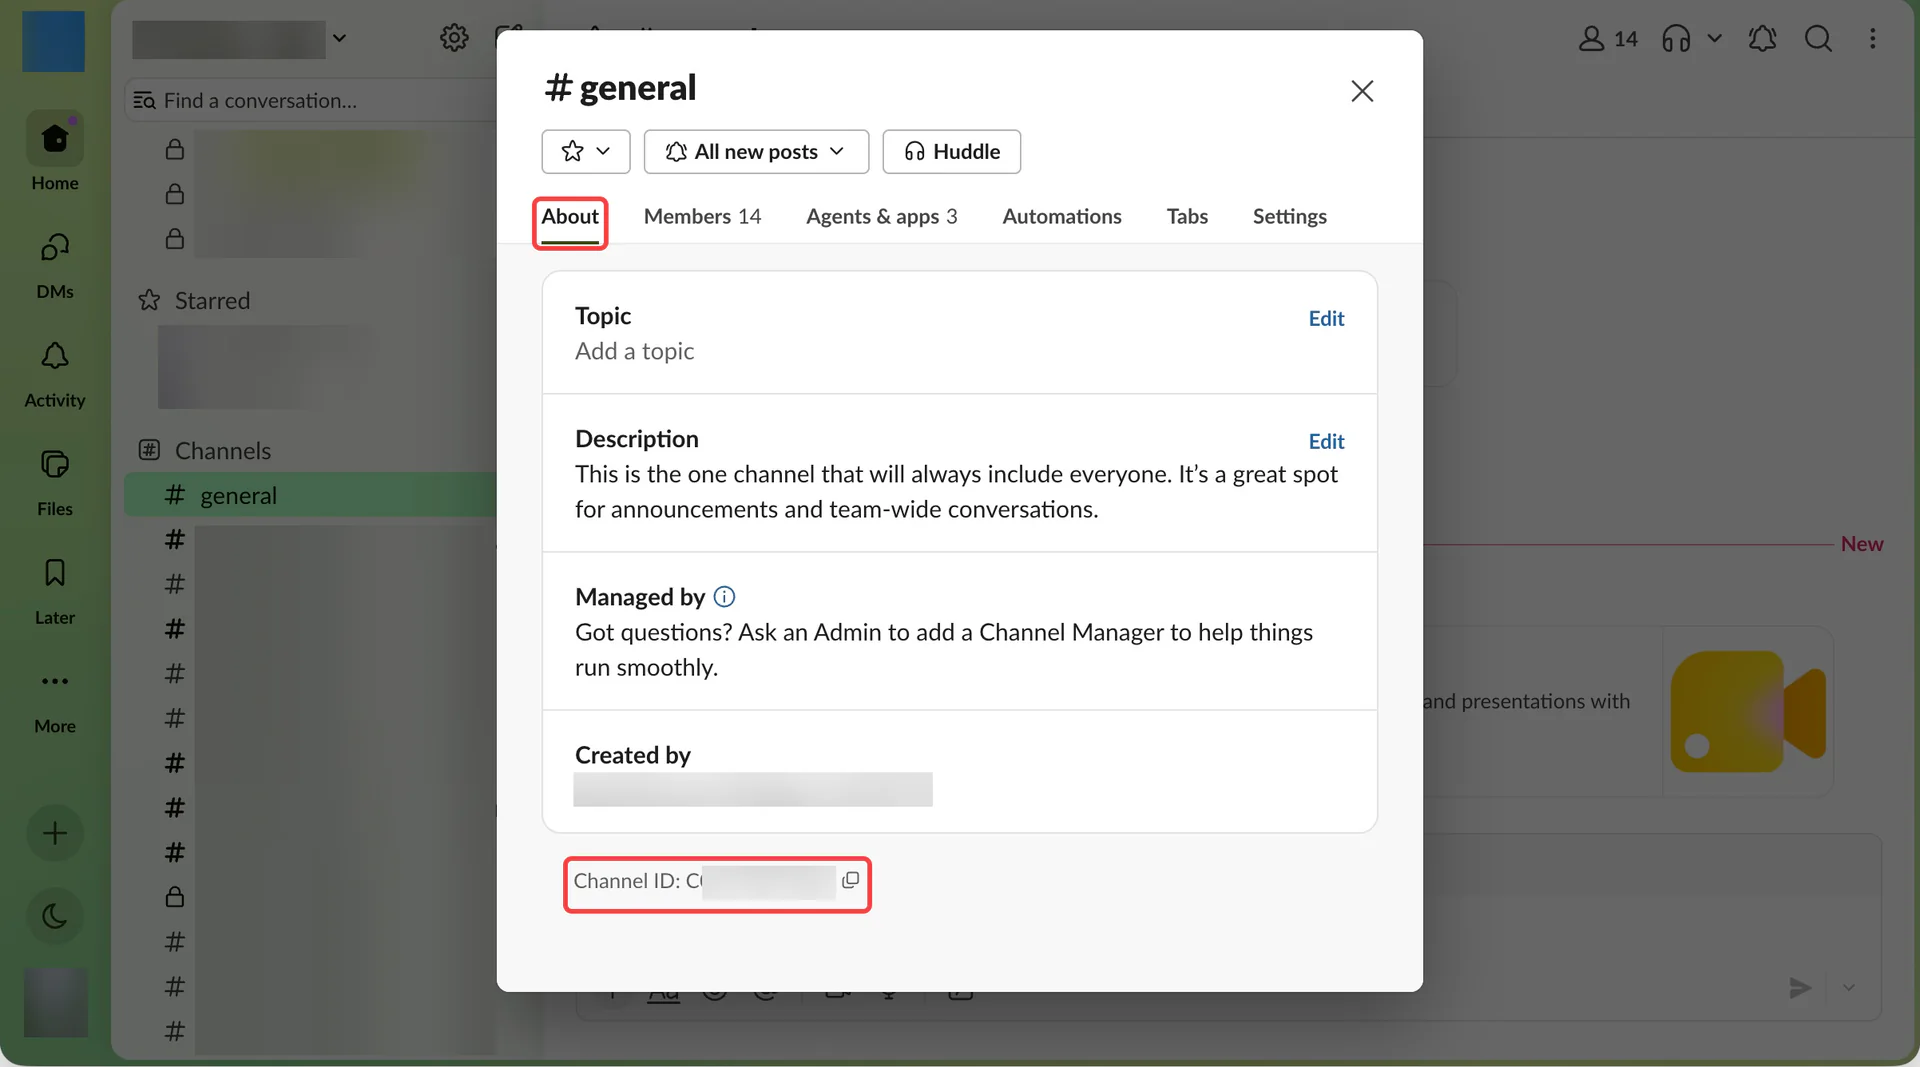
查找 Channel ID:点击 Slack 频道名称 → About,复制底部的 Channel ID。
常见问题
Request URL 无法验证
确认 Socket Mode 已关闭,回调 URL 完整且属于当前渠道,Signing Secret 来自同一个 Slack App。回调必须能从公网通过 HTTPS 访问。修正后在 Slack 点击 Retry,等待 Verified 后保存。
已经 Verified,仍没有回复
依次检查 Bot 是否加入频道、五类事件是否保存、修改权限后是否重新安装、AIP 是否关联已启用的 Agent,以及消息是否满足回复触发规则。测试时先在频道中 @Bot,或直接私聊。
仍无回复时,将渠道名称和发送时间交给管理员排查。附件失败时,还需核对 files:read、files:write 以及 Agent 的文件操作和可用能力设置。
新渠道接入后,旧渠道收不到消息
检查是否复用了同一个 Slack App 并替换了 Events Request URL。将旧 App 恢复为原回调,为新渠道创建独立 App。
能聊天,但无法搜索或读取历史
读取历史时,向 Agent 提供 Bot 已加入频道的 Channel ID;读取线程时再提供 Thread ID。公共和私有频道都受 Slack 授权限制。
公开搜索使用 search:read.public,可能包含 Bot 尚未加入的公开频道,不提供私有频道全局搜索。检查当前安装的 Token 是否已获得该权限和管理员批准。范围说明见 Slack 公开搜索权限。